




Find Your Property

hamburger-background

Master Estate Agent Photography: 5 Tips for Stunning Property Photos

It goes without saying that good photography is a crucial element of your real estate marketing. This has pretty much always been the case – but is more true than ever, now that the web and social media play such a key role in property searches.

Did you know that 87% of homebuyers rely on online listings as their primary search tool? Without eye-catching visuals, your property might be overlooked entirely. 

Stunning images of the interior – and exterior – of a property can certainly secure its place on a house hunter’s wish list. Fail to make that vital first impression, though, and potential buyers will quickly scroll on to the next listing. Even worse, your real estate photography could end up on a gallery of horrors, such as this! 

While it’s tricky to turn yourself into a pro overnight, there are some key things you can do to improve your shots and make sure it all goes smoothly.  

We’ve boiled these down to five essential tips for estate agent photography. 

Five essential tips for estate agent photography

estate agents photography

1. Invest in the right equipment 

While smartphone cameras have made impressive strides in quality, they still fall short when it comes to capturing professional-grade real estate images. High-end equipment not only delivers superior results but also provides greater flexibility and control over your shots. Here’s what you’ll need and why:

1. A Good Digital SLR (DSLR) or Mirrorless Camera

A DSLR or mirrorless camera is essential for estate agent photography. These cameras offer larger sensors, which mean sharper images with better colour reproduction and depth, even in low light. For example:

  • Entry-level DSLR: Canon EOS Rebel T7 or Nikon D3500 – ideal for beginners looking for affordability.
  • Mid-range option: Sony Alpha A6400 or Canon EOS R10 – perfect for agents seeking more advanced features.

2. A Wide-Angle Lens

A wide-angle lens is critical for capturing the maximum space inside a room. It helps make rooms look more spacious and inviting, rather than small and confined. For example:

  • Recommended lens: A 10-22mm or 16-35mm lens is excellent for capturing interiors while minimising distortion.
  • Example in use: Imagine photographing a kitchen; with a wide-angle lens, you can show the entire countertop, cabinetry, and dining space in one shot, giving buyers a clearer perspective.

3. A Tripod

Tripods ensure stability, eliminating the risk of camera shake and producing sharp, professional images. They’re especially helpful for longer exposures in low light. Examples of good tripods include:

  • Budget-friendly option: Amazon Basics 60-Inch Lightweight Tripod – affordable and easy to transport.
  • Professional choice: Manfrotto MT190XPRO4 – sturdy, versatile, and highly durable.
  • Practical tip: Use a tripod for photographing dimly lit rooms like basements or evening exterior shots.

4. Spare Memory Cards and Batteries

Running out of storage or battery power in the middle of a shoot can derail your schedule. Always carry extras:

  • Recommended memory card: SanDisk Extreme Pro 128GB – fast and reliable for high-resolution images.
  • Pro tip: Pack at least two fully charged batteries and a backup charger in case your shoot runs longer than planned.

Additional Recommendations

  • Light Sources: Consider an external flash or LED light panel for dim spaces.
  • Camera Remote: A remote shutter release ensures you don’t accidentally bump the camera while taking shots.

Investing in quality equipment might seem costly initially, but it pays off by helping you create stunning, professional images that can attract more buyers and lead to faster property sales.

2. Learn How to Use Your Equipment 

Owning top-notch equipment is only half the battle; knowing how to use it effectively is what sets great property photography apart. While modern cameras often feature automatic settings that produce decent results, manual settings offer you far greater control over the final outcome. Here’s a deeper dive into the key settings and how they impact your photography:

Master the Three Key Camera Settings

  1. Shutter Speed
    • What It Does: Shutter speed determines how long the camera’s sensor is exposed to light. A slower shutter speed allows more light in but can lead to blurry images if there’s motion or the camera isn’t stabilised.
    • For Property Photography:
      • Use slower shutter speeds (e.g., 1/30 or 1/60) for interior shots in low-light conditions, but always use a tripod to maintain sharpness.
      • Opt for faster speeds (e.g., 1/125 or higher) for exterior shots on windy days to prevent motion blur from moving trees or flags.
    • Example: Capturing a bright, airy living room with a slower shutter speed and tripod creates a well-lit, crisp image without harsh shadows.
  2. ISO
    • What It Does: ISO measures your camera’s sensitivity to light. Lower ISO settings produce clearer images with less noise, while higher ISOs work in darker environments but can introduce graininess.
    • For Property Photography:
      • Use ISO 100–200 in bright, well-lit spaces for the sharpest results.
      • In darker rooms, increase ISO moderately (e.g., up to ISO 800) but balance this with the other settings to minimise noise.
    • Example: Shooting a dim hallway? Increasing ISO to 400 while using a slower shutter speed ensures sufficient light without grainy distortions.
  3. Aperture (f-stop)
    • What It Does: Aperture controls how much light enters the lens and affects depth of field (how much of the scene is in focus). Smaller f-numbers (e.g., f/2.8) create a shallow depth of field, while larger f-numbers (e.g., f/11) keep more of the scene in focus.
    • For Property Photography:
      • Aim for a mid-range aperture (f/7.1 to f/11) to keep all elements of the room in sharp focus.
      • A wide aperture (e.g., f/2.8) can create a soft, blurred background for close-up shots of key features like a fireplace or countertop.
    • Example: To capture a room’s full layout, use f/8 for consistent focus across the furniture, walls, and windows.

Resources for Further Learning

To get comfortable with these settings, invest time in learning from reliable resources:

Practice Makes Perfect

  • Before your first professional shoot, practise extensively on your own property or at a friend’s home. Experiment with different settings and review the results to understand how adjustments impact the final image.
  • For example, try photographing a bright kitchen using ISO 100, a shutter speed of 1/60, and an aperture of f/8. Compare this to a dimly lit bedroom using ISO 400, a shutter speed of 1/30, and an aperture of f/11. This hands-on experience will make you more confident in choosing the best settings on-site.

3. Be prepared

Preparation is key to ensuring your property photography session runs smoothly and yields the best results. Both you and the vendor have roles to play in setting the stage for success.

Here’s a checklist to guide your efforts:

interior property photography

Vendor Preparation: Declutter and Stage the Home

Encourage vendors to prepare their property by addressing clutter and enhancing the aesthetic appeal. Share this handy list with them before the shoot:

Decluttering Tips

  • General Spaces: Remove personal items like family photos, toys, and loose paperwork to create a neutral and inviting space.
  • Living Room: Tidy up cushions and throws, clear coffee tables of remotes or magazines, and neatly arrange books or decor on shelves.
  • Kitchen: Store away small appliances (e.g., toasters, kettles) and wipe down all surfaces to create a clean, minimalist look.
  • Bedrooms: Ensure beds are neatly made with fresh, coordinated bedding. Clear bedside tables of unnecessary items.
  • Bathrooms: Hide toiletries, remove hanging towels, and always put toilet lids down for a polished appearance.
  • Outdoor Spaces: Tidy gardens, mow the lawn, remove bins, and park cars out of sight. Consider placing a seating area or adding potted plants.

Staging Techniques

Staging adds warmth and charm, helping buyers visualise themselves in the space. Share these simple ideas:

  • Add fresh flowers or greenery to dining tables, coffee tables, or kitchen counters for a pop of colour and vibrancy.
  • Set the dining table with elegant dinnerware and folded napkins to create a welcoming scene.
  • Use soft furnishings like neutral cushions and throws to enhance the cosiness of living areas.
  • Place a bowl of fresh fruit or a tray with coffee mugs on the kitchen counter for a lived-in feel.
  • Light a few softly scented candles or arrange neatly stacked towels in the bathroom for a spa-like touch.

Photographer Preparation: Plan Ahead

To maximise efficiency on the day, ensure you’re well-prepared too.

Create a Plan

  • Shot List: Plan your approach by listing shots for each room, including wide-angle views and close-ups of key features (e.g., fireplaces, built-ins).
  • Time Management: Allocate around two hours for a medium-sized house, with approximately 25 usable photos as your goal.
  • Lighting Awareness: Identify optimal times for exterior shots based on natural light. For example, morning or golden hour often works best.

Prepare Your Gear

  • Pack your camera, lenses, tripod, memory cards, and backup batteries.
  • Bring a clipboard or app to check off rooms and angles as you go.
  • Include lens wipes and a cleaning kit in case of smudges or dust during the shoot.

With a clear plan and a well-prepared property, you’ll have the foundation to create stunning images that showcase each home’s potential. Preparing in advance not only saves time but ensures every shot captures the property in its best light.

4. On the day – remember these hacks 

It’s easy to get stressed and miss something so take a crib sheet listing everything you need to remember. Our advice for getting the best shots is: 

  • Make sure there’s plenty of light – open all blinds and doors and use artificial light if needed. 

  • Be careful about the midday sun – you may need a self-timer to keep your shadow out of shot. 

  • Shoot from the corner of a room so you can capture three walls – if it’s a tiny room, shoot from the doorway. 

  • Always shoot in landscape. 

  • Shoot at eye level for most rooms, though you may need to position your tripod at chest height for kitchens to get the best view of cabinets and fixtures. 

  • Make sure you take plenty of shots of each room and always check them before moving on – you don’t want to have to come back.
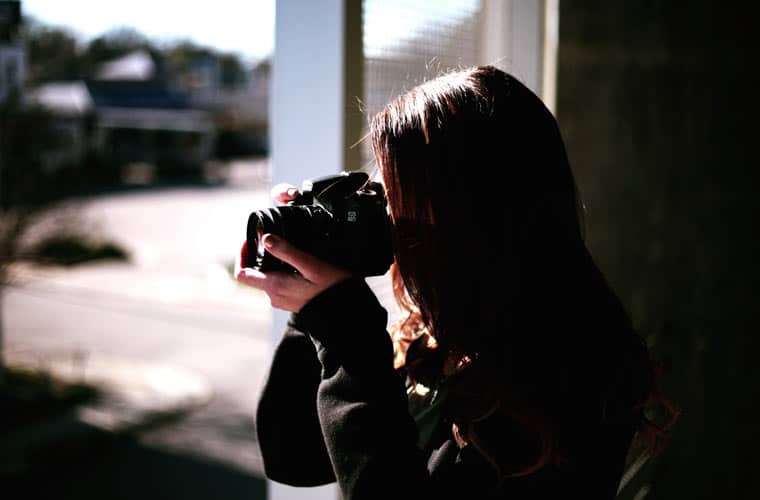
professional property photography

Enhance Composition for Stunning Shots

Great photography is not just about technical settings—it’s also about how you frame the shot. Keep these composition tips in mind:

  • Symmetry: Look for natural symmetry in the room, such as centred furniture or aligned decor, to create balanced, eye-pleasing images.
  • Leading Lines: Use architectural elements like hallways, countertops, or furniture edges to draw the viewer’s eye deeper into the scene.
  • Rule of Thirds: Imagine a 3×3 grid on your image and place focal points along these lines or intersections for a well-composed shot.
  • Balancing Elements: Ensure that the visual weight of items (e.g., furniture or decor) is evenly distributed to avoid one-sided compositions.

4. In the cutting room 

Post-production is where good photos become truly outstanding. With the right tools and techniques, you can enhance your shots to bring out the best in each property. Whether you’re correcting lighting, removing clutter, or adding subtle enhancements, photo editing is an essential step in the process.

Editing Tools for Every Budget

Not sure where to start with editing software? Here are some popular options for both professionals and beginners:

Professional-Grade Tools

  • Adobe Lightroom: Ideal for organising and editing large batches of photos. It offers precise control over lighting, colour correction, and cropping.
  • Adobe Photoshop: The go-to software for advanced editing, such as retouching and removing unwanted elements from images.
  • Capture One: A powerful alternative to Lightroom, especially for RAW file editing.

Free or Budget-Friendly Options

  • GIMP (GNU Image Manipulation Program): A free, open-source tool with advanced features similar to Photoshop. Perfect for those on a budget.
  • Canva: A user-friendly tool for simple photo adjustments and adding design elements. Ideal for beginners or quick edits.
  • Snapseed: A free mobile app from Google that allows for on-the-go editing with a wide range of professional features.

Editing Tips for Estate Agent Photography

  • Enhance Lighting and Colours: Adjust brightness, contrast, and saturation to make the property look warm and inviting. For example, brighten shadows in a dimly lit room or enhance the blue sky in an exterior shot.
  • Correct Distortions: Use lens correction tools to fix wide-angle distortions and ensure straight lines in interiors.
  • Remove Distractions: Clean up small imperfections like stray cables, scuff marks, or unwanted reflections.
  • Avoid Overediting: Subtlety is key. Overusing filters or overexposing images can make them look artificial, which may turn off buyers.
Editing

When to Outsource

If photo editing feels overwhelming or you’re working on a tight schedule, outsourcing the task to a professional can be a game-changer. Many services specialise in real estate photography enhancement, offering everything from virtual staging to advanced retouching.

Hiring a professional  

Alternatively, you can outsource image enhancement to a professional – it’s important to know when you’re out of your depth! The same goes for the whole estate agent photography process. While hiring a pro is an extra cost, it may pay off if slicker results lead to a boost in sales. 

When hiring, review their portfolio to ensure they have experience in property photography. Look for natural lighting and realistic edits.

Drone photography

More and more estate agents are now offering drone photography as part of their service. Drone Aerial photography can increase the saleability of a residential or a commercial property.  It also works very well when promoting a plot of land or a new development.

Frequently Asked Questions

1. What equipment do I really need for great estate agent photography?

For strong property images you’ll want a good camera (DSLR or mirrorless), a wide-angle lens to capture space, a sturdy tripod for steadiness, and spare batteries and memory cards. These basics make a big difference in quality and consistency.

2. Can I use my smartphone instead of a camera?

Smartphones have improved significantly and can do a decent job in bright, well-lit spaces. But for truly professional estate agent photography you’ll usually get much sharper and more flexible results from dedicated cameras and lenses.

3. How should I prepare a property before taking photos?

Before shooting, declutter, clean, and depersonalise all rooms. Open blinds and curtains to maximise natural light, tidy outdoor areas, and remove personal items so buyers can imagine themselves in the space.

4. How many photos should I take for a listing?

Aim to capture a wide range of shots that cover every key room and feature. Many listings benefit from around 20 strong images, but you can shoot more and select the best for your marketing.

5. Should I edit property photos before publishing them?

Yes. Basic editing such as adjusting brightness, correcting distortions, and removing small distractions will help your images look more professional without misleading buyers. Subtle, realistic edits work best.

Can we help? 

Once you have your portfolio of shots you can start marketing the property to potential buyers. If you need help with your marketing strategies, including using social media, Art Division might be able to help.

Contact us the find out more about our services for estate agents.

Tags: ,

Send us an enquiry

"*" indicates required fields

This field is for validation purposes and should be left unchanged.
This form collects and stores the information provided by you, so that we can contact you about your requirements. Please read our privacy policy for full information on how we manage and protect your submitted data.